Automated AWS spot instance provisioning with persisting of data
After following this guide, you will be able to spin up an AWS EC2 spot instance by executing a single command from your terminal. The instance will have a volume attached that will be persisted across shutdowns.


This blog post was originally published on Medium on 09/23/2017. This was my first ever article that I wrote to share with the fast.ai community.
I use this to work on the outstanding MOOC Practical Deep Learning for Coders, Part 1. I keep whatever data I need on the persisted volume, ssh into the instance upon booting, and start jupyter notebook. I then follow a bookmark in my browser to access it.
The teardown also happens via a single command.
This tutorial is fairly lengthy but I try to explain everything as clearly as possible and the convenience this setup affords is quite good. I invite you to give it a shot!
Prerequisites
You need to be running any flavor of Linux. Most likely most of this will also work on Mac OS but I haven’t had a chance to try.
You need to have the AWS CLI installed and configured (I don’t cover this in this guide but if you would have questions on how to set this up let me know please and I’ll try to help).
Without further ado, let’s get started!
Bringing up the environment (Virtual Private Cloud)
- From your terminal, clone my scripts repository and cd into it
git clone git@github.com:radekosmulski/aws-setup.git && cd aws-setup
2. Bring up the VPC along with all the necessary pieces (Internet gateway, subnet, security group, etc).
./create-env.sh
That’s it! Now onto spinning up our first spot instance!
Configuring our workstation in the cloud
We will now spin up a brand new instance and configure it to our liking. We will then take an image of it and will use it as a blueprint for instances for continued use.
3. Spin up a p2.xlarge spot instance. The first argument is the instance type, second is the spot price you are willing to pay.
./request-spot-instance.sh p2.xlarge 0.25
4. Add the newly created directory in your home (~/aws_scripts) to your path. I do this by appending the following to my .profile in my home directory
if [ -d “$HOME/aws_scripts” ] ; then
 PATH=”$HOME/aws_scripts:$PATH”
fi
You will need to log out and log in for this to take effect. This will allow you to manage your cloud workstation from anywhere in your file system!
5. Connect to your spot instance. In your terminal execute:
authorize-current-ip && spot-instance-connect
6. Configure the instance to your liking. Even if you are not planning on using the instance for the fast.ai MOOC, a good starting point is running the slightly modified setup script provided for the course:
wget https://raw.githubusercontent.com/radekosmulski/courses/master/setup/install-gpu.sh && bash install-gpu.sh
7. Shred the ssh keys for maximum reusability
sudo shred -u /etc/ssh/*_key /etc/ssh/*_key.pub
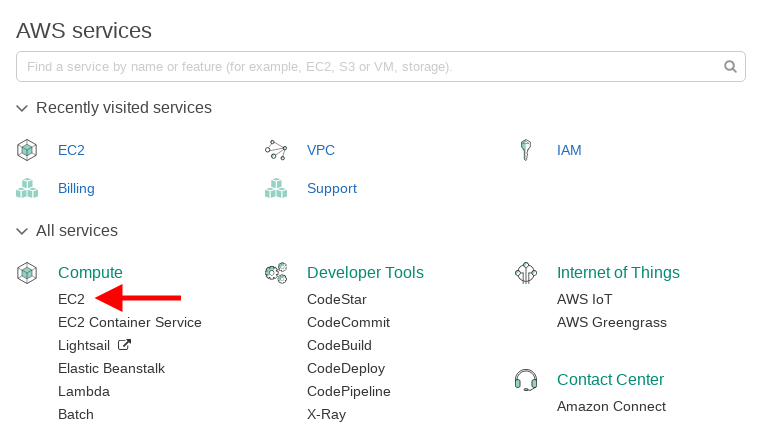
8. Log into AWS console and navigate to EC2
Go to Instances, click Actions and take the image of your running instance

Side note: It can take a while for the image creation to complete. You can check progress under EC2 > Images > AMIs. Till the creation of the AMI completes, you will not be able to boot from it.
9. (Optional) You can now take your workstation for a spin and see if everything is set up correctly. You could for example try running the jupyter notebook.
exec bash && ./start-jupyter-notebook
You can find the public IP of your instance by executing the following in the terminal of your local computer:
cat ~/aws_scripts/spot-instance-connect
The IP will be the dot-separated numbers at the end of the displayed line after ubuntu@…
You can connect to the jupyter notebook by navigating to the following URL in your browser
https://<IP addr>:8888
The password for your notebook will be jupyter. The browser might warn you that the connection is not secure but do not worry about this — we are using our own SSL certificate to enable connecting over HTTPS, but that actually is a good thing!
Creating the persistent volume
We now need to create the volume that we will be attaching when we spin up a new spot instance and detaching before termination.
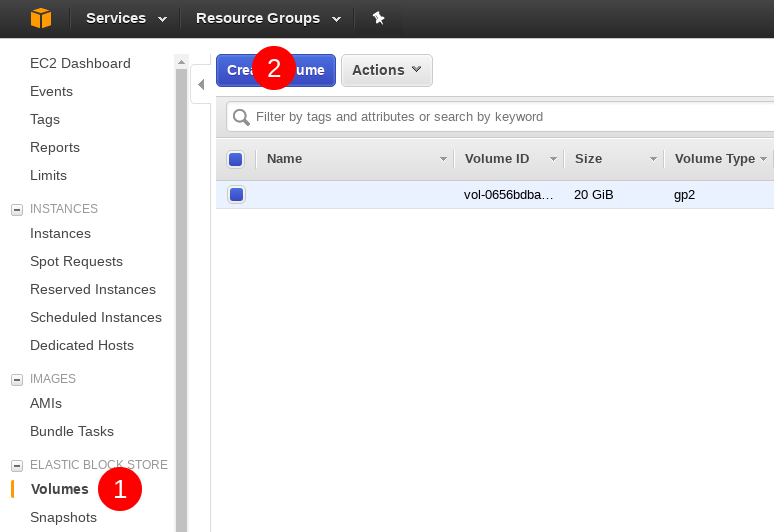
10. To do that, go to EC2 > Elastic Block Store > Volumes and click the Create Volume button
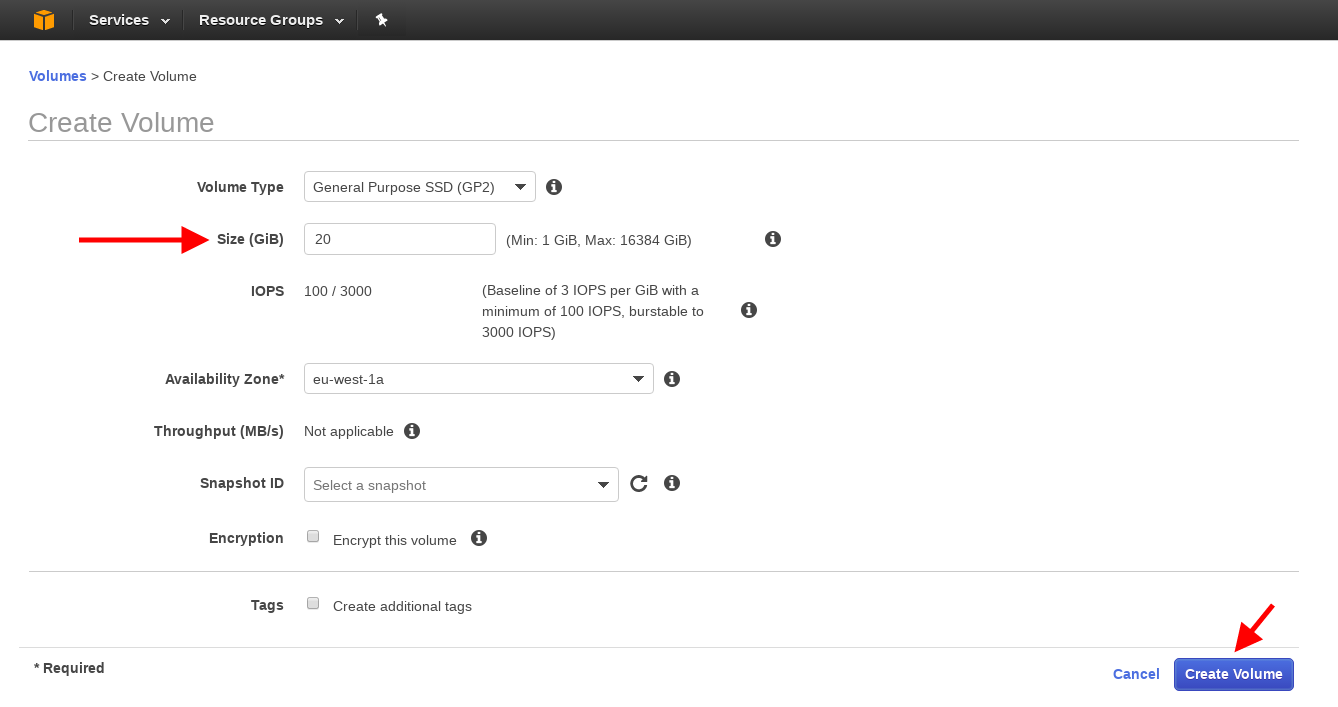
11. On the next screen specify the size of the volume you’d like to create (I am going with 20 GB here) and hit create.
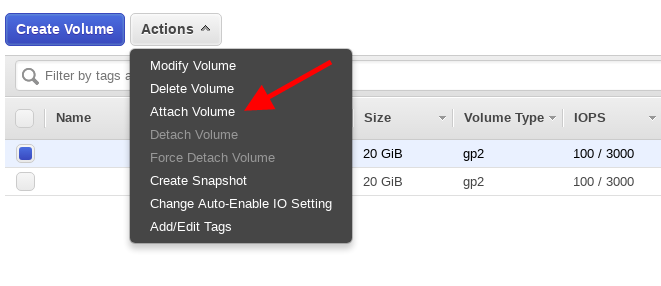
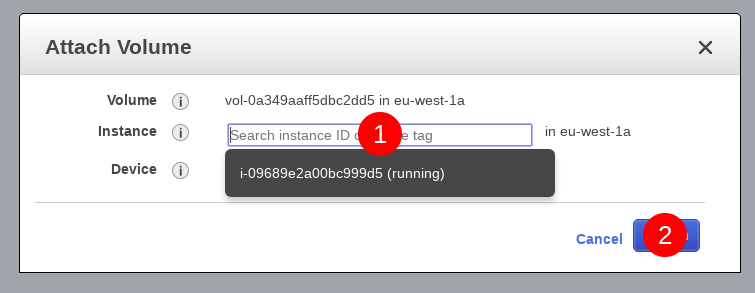
12. When the creation completes, select the volume and click Actions again and Attach Volume
13. On the pop-up screen, click on the Instance input field, select the spot instance and hit attach.
14. Go back to your ssh session. You can verify that everything went okay by running lsblk. You should see an entry at the bottom for the new volume with a name of xvdf.
15. Time to format the volume. Execute sudo fdisk /dev/xvdf
16. Inside fdisk, press
n
p
<enter>
<enter>
w
17. The partition is now created. We need to create a file system on it to be able to use it.
sudo mkfs -t ext4 /dev/xvdf1
18. Now that the file system is created let’s go ahead and mount it and grant ourselves the permissions to write to it.
./mount-workspace
cd workspace
sudo chmod go+rw .
19. And we are all set! Now that we have saved our blueprint and set up our detachable workspace, we can go ahead and tear down the spot instance we were using. From inside the aws-setup repository we cloned in step 1, execute
./spot-instance-remove.sh
Grande Finale
Most of the setup is complete. All we need to do now is create a network interface with a public IP and tag things appropriately so that our script can use them.
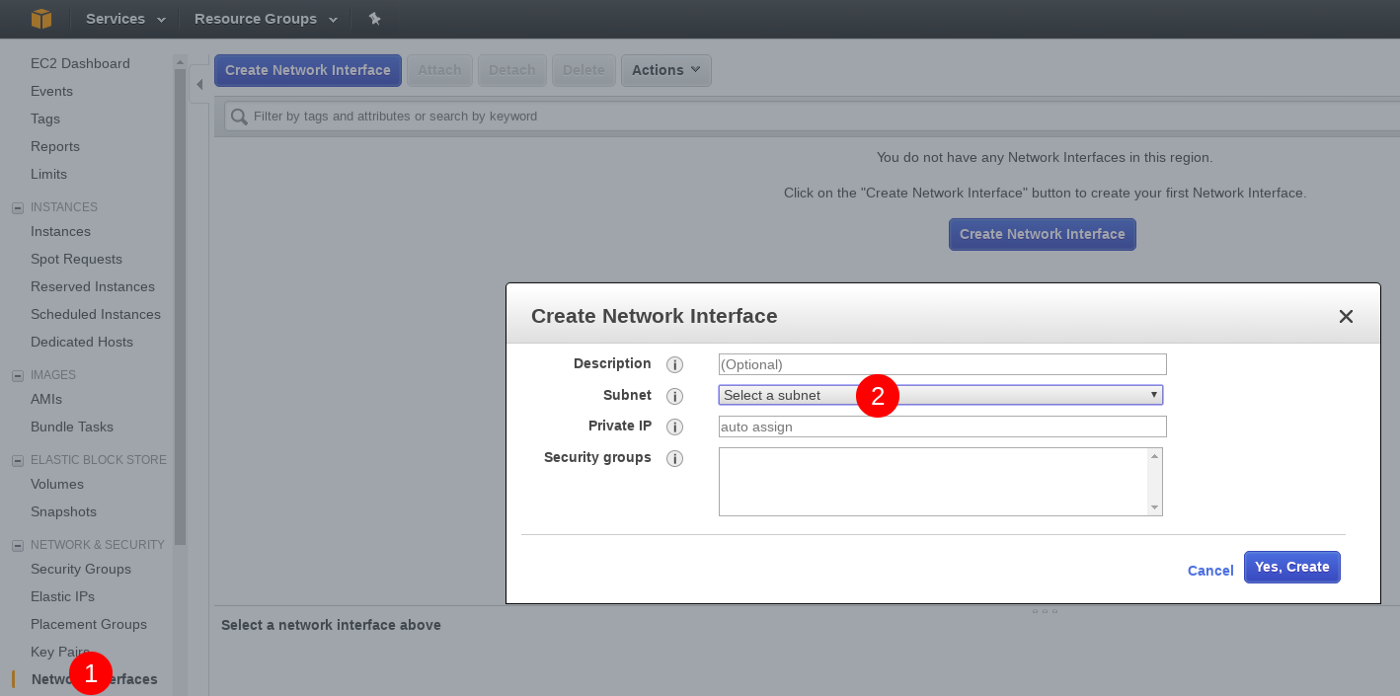
20. First, let’s create the network interface. Under Network & Security > Network Interfaces click Create Network Interface. Click the subnet dropdown and select the only available subnet
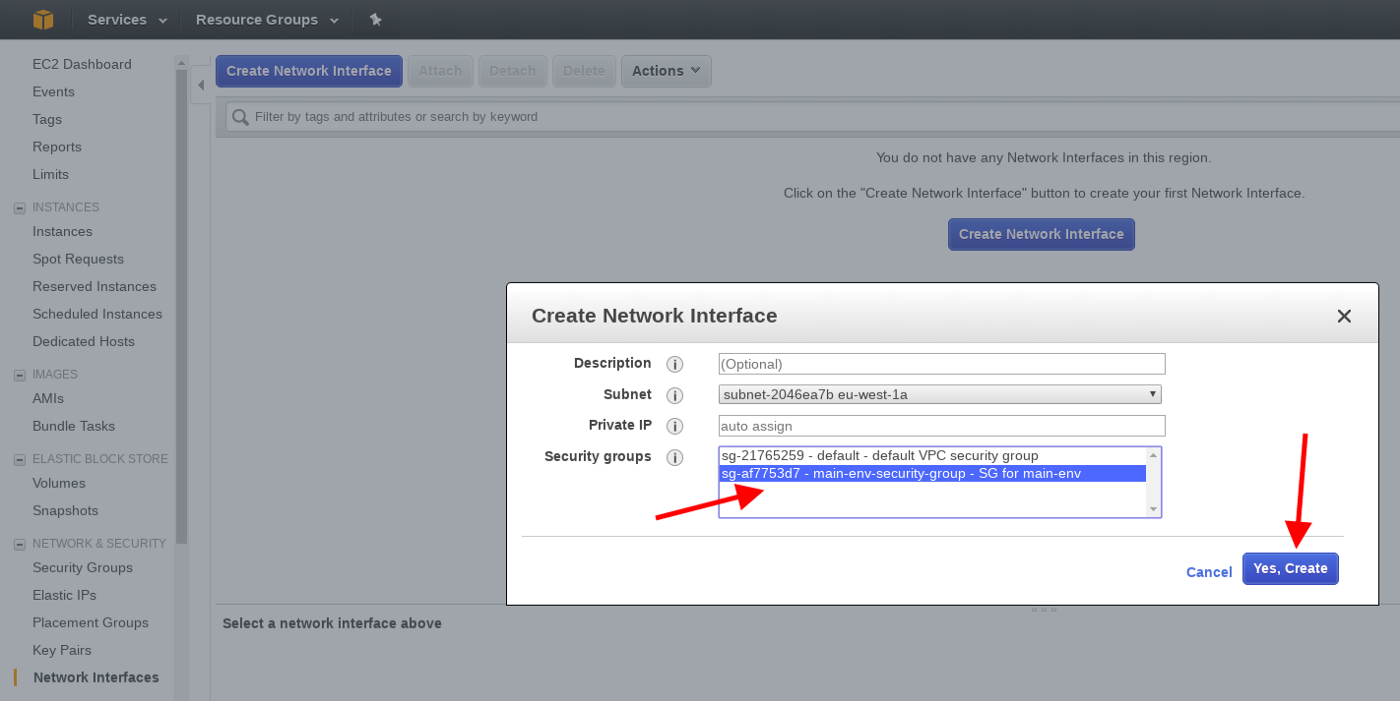
21. Select SG for main-env and click Yes, Create.
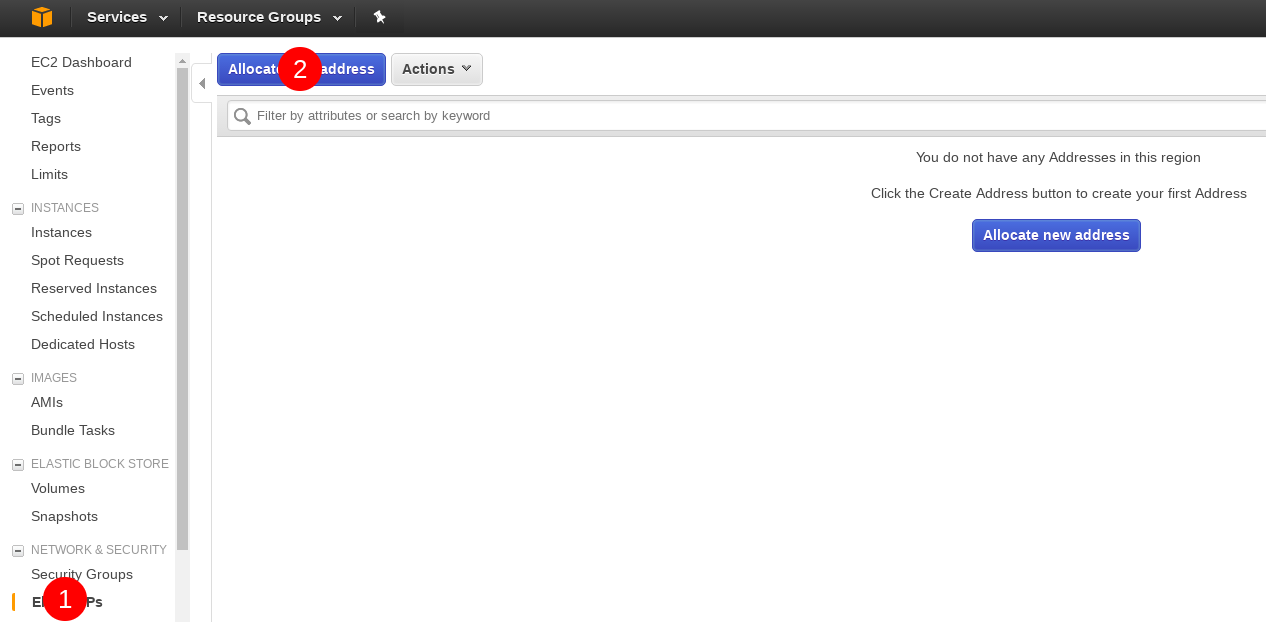
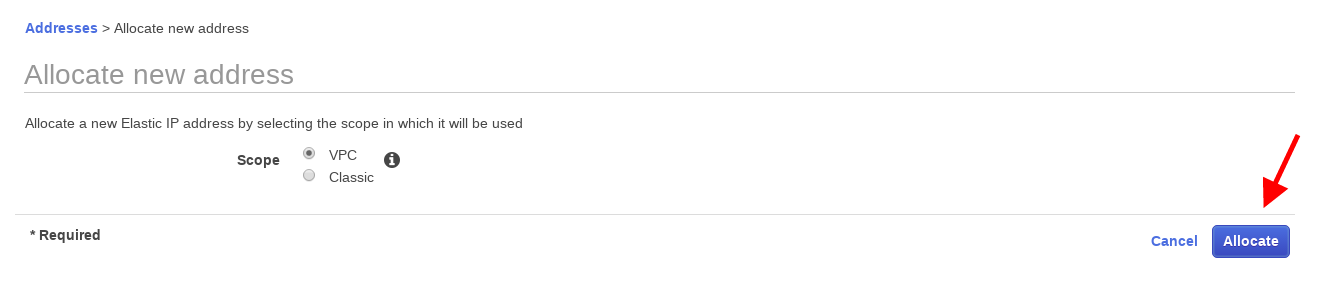
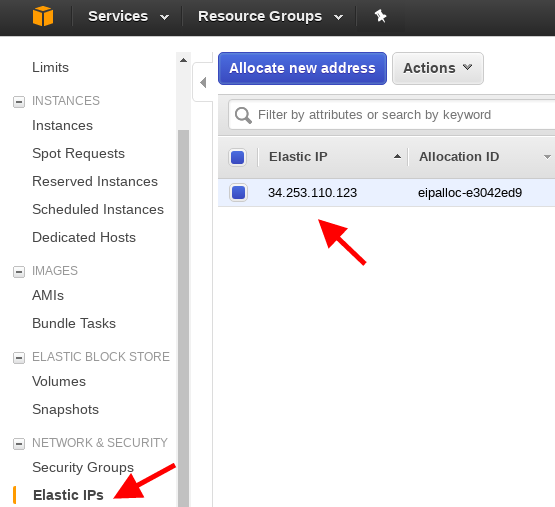
22. Go to Network & Security > Elastic IPs and click Allocate new address
23. Hit Allocate on the next screen without making any changes.
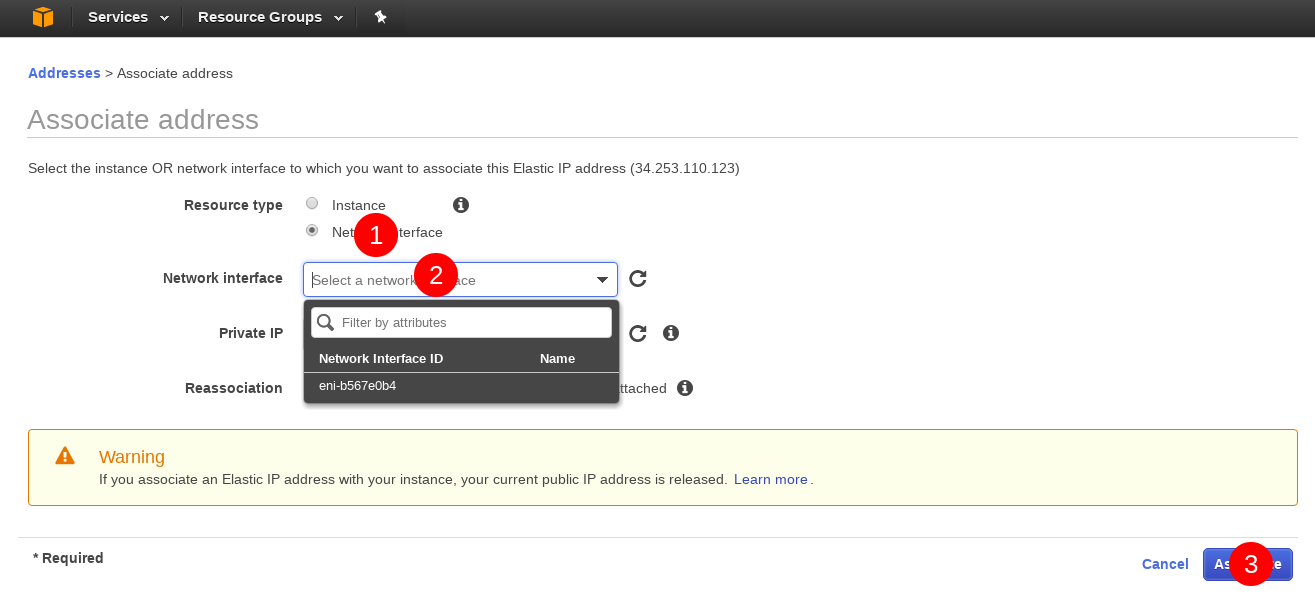
24. Close down the dialogue window, select the newly created Elastic IP address and associate it with the network interface created earlier.
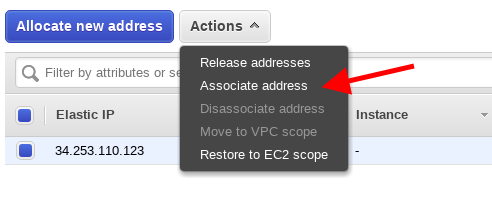
25. Select Network Interfaces, click on the input field and select the only network interface from the dropdown and click Associate.
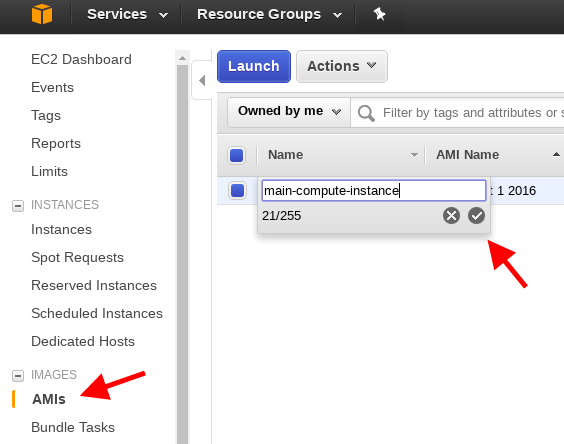
We are nearly there. Now all that remains is tagging all the individual pieces. Let’s start with our blueprint, the AMI.
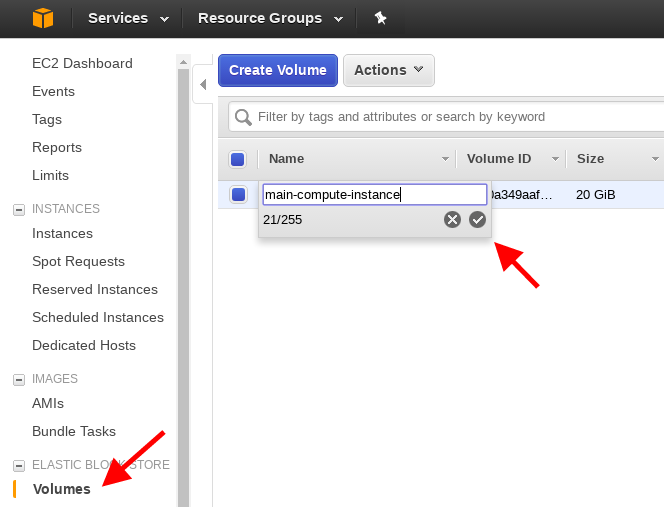
26. Under Images > AMI click on the name field and enter main-compute-instance.
27. Take a similar action for the volume
28. And the Network Interface

Assuming everything worked, this is it! You are now ready to enjoy your new setup!
Workflow steps
Request the main-compute-instance from the cloned aws-setup repository
./request-main-compute-instance.sh p2.xlarge 0.25
Ssh into it
main-compute-instance-connect
Mount the detachable volume and start jupyter notebook
./mount-workspace
./start-jupyter-notebook
Go to https://<public IP address of your network interface>:8888 in your browser. You can find the IP address under Elastic IPs
Access the notebook using the jupyter as the password. (You can bookmark the URL as the public IP address will not change across shutdowns).
Do whatever you want to do and save your work to the workspace directory.
When done, terminate the instance. From aws-setup directory, run
./main-compute-instance-remove.sh
When you boot up the main-compute-instance again, you will be able to mount the workspace volume and gain access to your data.
IMPORTANT: If you don’t authorize your local machine’s IP address, main-compute-instance-connect will time out. In such a situation, just run authorize-current-ip. Ideally, you should be deauthorizing your IP address after every use via running deauthorize-ip.
Post Scriptum
- Why do I need to authorize and deauthorize my IP address?
This configures ingress rules in the security group of our VPC so that only computers with a given public IP address can access your notebook. This might be a nuisance to some and can be disabled from AWS console. Will provide more details if necessary. - There are two additional steps that can make this setup even more convenient — I only configured this for myself several weeks after the initial version but I am enjoying those changes very much. This is what the process of booting up the instance looks like with additional configuration steps I mention below:
Additional setup instructions
- Configure
/etc/fstabfollowing the instructions described here starting with step #7. - Add the following line to your
/etc/rc.localsu ubuntu -c ‘bash /home/ubuntu/start-jupyter-notebook - Redo steps 7 through 9 of the above howto, then follow with step 26.
If you found this article interesting and would like to connect, you can find me on Twitter here.