How to train and validate on Imagenet

Training on Imagenet is something that is completely trivial after you do it once, but if you are just someone on the Internet without such prior experience, it is an insurmountable task.
Up until a couple of days ago, I didn't even know how to get the data!
And then you have the preprocessing script that maybe you will learn about if you luckily stumble upon an issue that mentions it...
Below I document all the necessary steps to hopefully make your life easier! We will use timm, an outstanding library by Ross Wightman, and optimized docker images from ngc by NVIDIA.
Obtaining the data
One way of getting Imagenet is through the official site. The problem with this approach is that you cannot register with an email from gmail or similar websites. Additionally, you need to pass an arbitrary approval process (wonder how that would go for me without an email in the .edu domain...).
Thankfully, there are alternatives. Some flavor of Imagenet is hosted on Kaggle, but who knows how it relates to the original dataset? It seems to have a different directory structure and has patched2019 in its name. There is no explanation in sight that would be parseable by someone who hasn't worked with Imagenet before.
Academic torrents to the rescue! Here are the torrents for the train and validation sets.
If you are on Ubuntu 20.04, you most likely have a torrent client already installed, transmission-gtk. I was able to download the torrents using it with no issues.
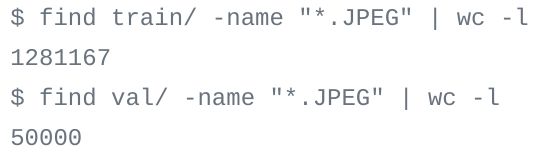
After you download the data, you need to migrate the files using this script. The first step is to extract it into train and val folders (this command can be helpful: tar -xf ILSVRC2012_img_train.tar -C train)
The setup
We will use a docker container as our environment. You first need to install the ngc cli by nvidia and create a key to authenticate (I am not sure on the authentication - maybe you can pull images without it).
The docs on how to setup your docker are extremely confusing, but the tldr; is this - if you have docker-ce 19.03 or above, you have (nearly) everything that you need for native GPU support (run docker version to check).
The missing ingredient is this (installing nvidia-container-toolkit):
distribution=$(. /etc/os-release;echo $ID$VERSION_ID)
curl -s -L https://nvidia.github.io/nvidia-docker/gpgkey | sudo apt-key add -
curl -s -L https://nvidia.github.io/nvidia-docker/$distribution/nvidia-docker.list | sudo tee /etc/apt/sources.list.d/nvidia-docker.list

sudo apt-get update && sudo apt-get install -y nvidia-container-toolkit
sudo systemctl restart docker
This is the command to list all available images: ngc registry image list and here is how you can obtain additional information on an image of interest ngc registry image info <image name>
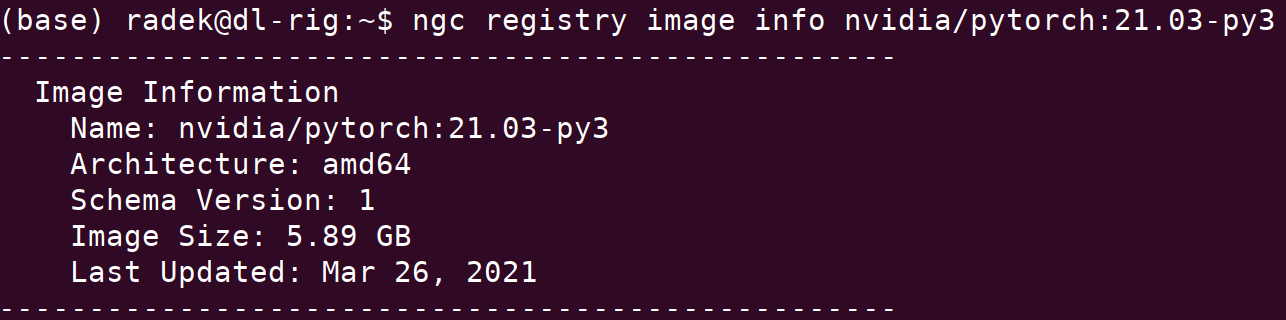
We can now pull our image of choice using the following command: docker pull <image name>, for example: docker pull [nvcr.io/nvidia/pytorch:21.03-py3](<http://nvcr.io/nvidia/pytorch:21.03-py3>)
You can then run the container as follows to be brought into the console inside it (this will additionally remove the container after running and will also mount local dir as /dir_on_host (you need to put pwd in backticks): docker run --gpus all -it --rm -v pwd:/dir_on_host nvcr.io/nvidia/pytorch:21.03-py3
If you follow the above with a command, it will be executed and the container will terminate after running the command, for instance: docker run --gpus all -it --rm -v pwd:/dir_on_host nvcr.io/nvidia/pytorch:21.03-py3 nvidia-smi
Here is how to run the container but limit the visibility of GPUs (if you have more than one): docker run --gpus "device=0,1" ...
We can now build our own image that we will use for training and validation.
Build a docker image for training
- Create a directory for storing everything needed to train on imagenet and cd into it.
mkdir imagenet_timm_ngc && cd imagenet_timm_ngc - Create an
imagenetdirectory and store thetrainandvaldirectories inside (I opt for using the softlink here).

3. Grab the scripts needed for preprocessing:
https://raw.githubusercontent.com/tensorflow/models/master/research/slim/datasets/preprocess_imagenet_validation_data.py
https://raw.githubusercontent.com/tensorflow/models/master/research/slim/datasets/imagenet_2012_validation_synset_labels.txt
To check everything worked well:
4. Run the preprocessing script python preprocess_imagenet_validation_data.py imagenet/val/ imagenet_2012_validation_synset_labels.txt
5. If you haven't yet moved the train images into subfolders, you can do so using the following command cd imagenet && find . -name "*.tar" | while read NAME ; do mkdir -p "${NAME%.tar}"; tar -xvf "${NAME}" -C "${NAME%.tar}"; rm -f "${NAME}"; done
6. Let's create our Dockerfile
cat <<EOT >> Dockerfile
FROM nvidia/pytorch:21.03-py3

https://github.com/rwightman/pytorch-image-models.git
cd pytorch-image-models
pip install -r requirements.txt
pip install colorama
EOT
7. Let's build our image docker build -t timm .
Command used for training: docker run --gpus all --ipc=host -it --rm -v /home/radek/workspace/imagenet_timm_ngc:/workspace -v /home/radek/superfast/imagenet:/workspace/imagenet timm ./distributed_train.sh 1 ../imagenet -b 64 --model resnet34 --sched cosine --epochs 200 --lr 0.05 --aug-splits 3 --aa rand-m9-mstd0.5-inc1 --resplit --jsd
Another couple of commands for reference:
restore from checkpoint: <cmd_to_train> --resume /workspace/pytorch-image-models/output/train/20210407-124412-resnet34-224/last.pth.tar
evaluate model: docker run --gpus all --ipc=host -it --rm -v /home/radek/workspace/imagenet_timm_ngc:/workspace -v /home/radek/superfast/imagenet:/workspace/imagenet timm python validate.py ../imagenet --model resnet34 --checkpoint /workspace/pytorch-image-models/output/train/20210407-124412-resnet34-224/last.pth.tar
Additional points to consider
Two flags you should always try training with (can significantly speed up training but might not work for certain architectures, software versions and hardware combinations):
--amp(fp16 training)--channels_last
Timmdocs - a great source of information on the library with an in-depth discussion of techniques that can be used during training
UPDATE: Kaggle dataset mystery solved
These are the file differences between original imagenet dataset (torrent download) and dataset available on Kaggle
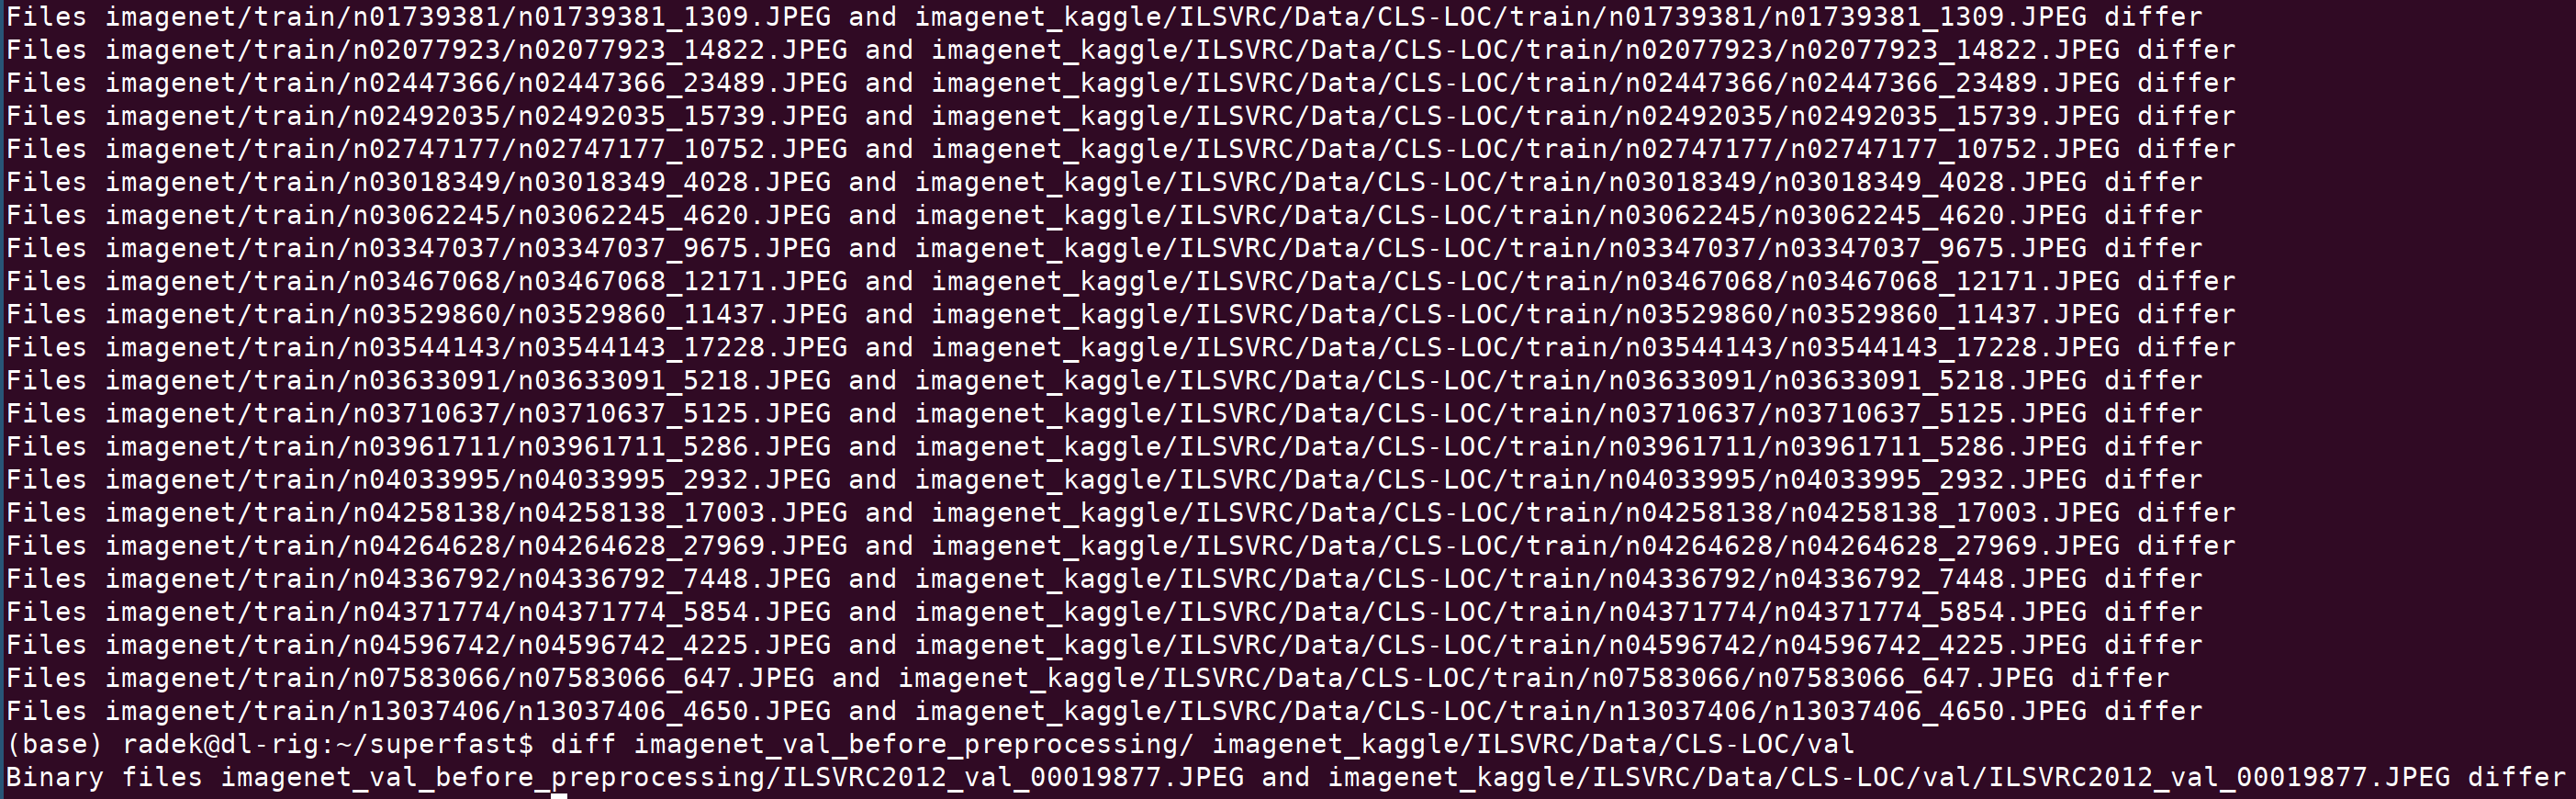
Seems the differences are tiny. Still, if one would like to have the exact same dataset as the one on torrents, I provide the original files here.
In case this might be useful, here is where the files should go in the Kaggle directory structure (also, remember to put the single file from the validation set into the shared val directory, I only list the files from train below)
ILSVRC/Data/CLS-LOC/train/n01739381/n01739381_1309.JPEG
ILSVRC/Data/CLS-LOC/train/n02077923/n02077923_14822.JPEG
ILSVRC/Data/CLS-LOC/train/n02447366/n02447366_23489.JPEG
ILSVRC/Data/CLS-LOC/train/n02492035/n02492035_15739.JPEG
ILSVRC/Data/CLS-LOC/train/n02747177/n02747177_10752.JPEG
ILSVRC/Data/CLS-LOC/train/n03018349/n03018349_4028.JPEG
ILSVRC/Data/CLS-LOC/train/n03062245/n03062245_4620.JPEG
ILSVRC/Data/CLS-LOC/train/n03347037/n03347037_9675.JPEG
ILSVRC/Data/CLS-LOC/train/n03467068/n03467068_12171.JPEG
ILSVRC/Data/CLS-LOC/train/n03529860/n03529860_11437.JPEG
ILSVRC/Data/CLS-LOC/train/n03544143/n03544143_17228.JPEG
ILSVRC/Data/CLS-LOC/train/n03633091/n03633091_5218.JPEG
ILSVRC/Data/CLS-LOC/train/n03710637/n03710637_5125.JPEG
ILSVRC/Data/CLS-LOC/train/n03961711/n03961711_5286.JPEG
ILSVRC/Data/CLS-LOC/train/n04033995/n04033995_2932.JPEG
ILSVRC/Data/CLS-LOC/train/n04258138/n04258138_17003.JPEG
ILSVRC/Data/CLS-LOC/train/n04264628/n04264628_27969.JPEG
ILSVRC/Data/CLS-LOC/train/n04336792/n04336792_7448.JPEG
ILSVRC/Data/CLS-LOC/train/n04371774/n04371774_5854.JPEG
ILSVRC/Data/CLS-LOC/train/n04596742/n04596742_4225.JPEG
ILSVRC/Data/CLS-LOC/train/n07583066/n07583066_647.JPEG
ILSVRC/Data/CLS-LOC/train/n13037406/n13037406_4650.JPEG